

You wake up and the sun is shining. Everything is great and you sit down at your desk, ready to join the first video call of the day. And then – OOPS! You spill your breakfast smoothie over your keyboard. Does this sound familiar?
If you’ve ever encountered a situation such as the one described above and didn’t know how to act, after this post you will. We’ve written here easy to follow, step-by-step instructions on how to clean your keyboard.
Steps for salvaging the situation
- Turn off your device and place it upside down and wait for the liquid to drain.
- Turn the device around and clean away all visible traces of the liquid.
- Take a photo of your keyboard for future reference.
- Find a flat but sturdy tool, that can be inserted under the keycap. A flat-headed screwdriver is an option, but it might scratch the device and its components. Use a plastic tool, if possible.
- Some keyboards require the keys to be removed from the top, some from the bottom. Insert the tool under the keycap and gently apply upward pressure by pressing the tool. Continue to do so until you hear a snap and the keycap comes off. Remove also the small plastic parts underneath. Notice: If there is unusual resistance when detaching a key, stop! The keys might require a different method for removal.

- Place all the plastic parts in a bowl of warm water with mild detergent, such as dishwasher soap. Let them soak for a while to allow the dirt to come off.
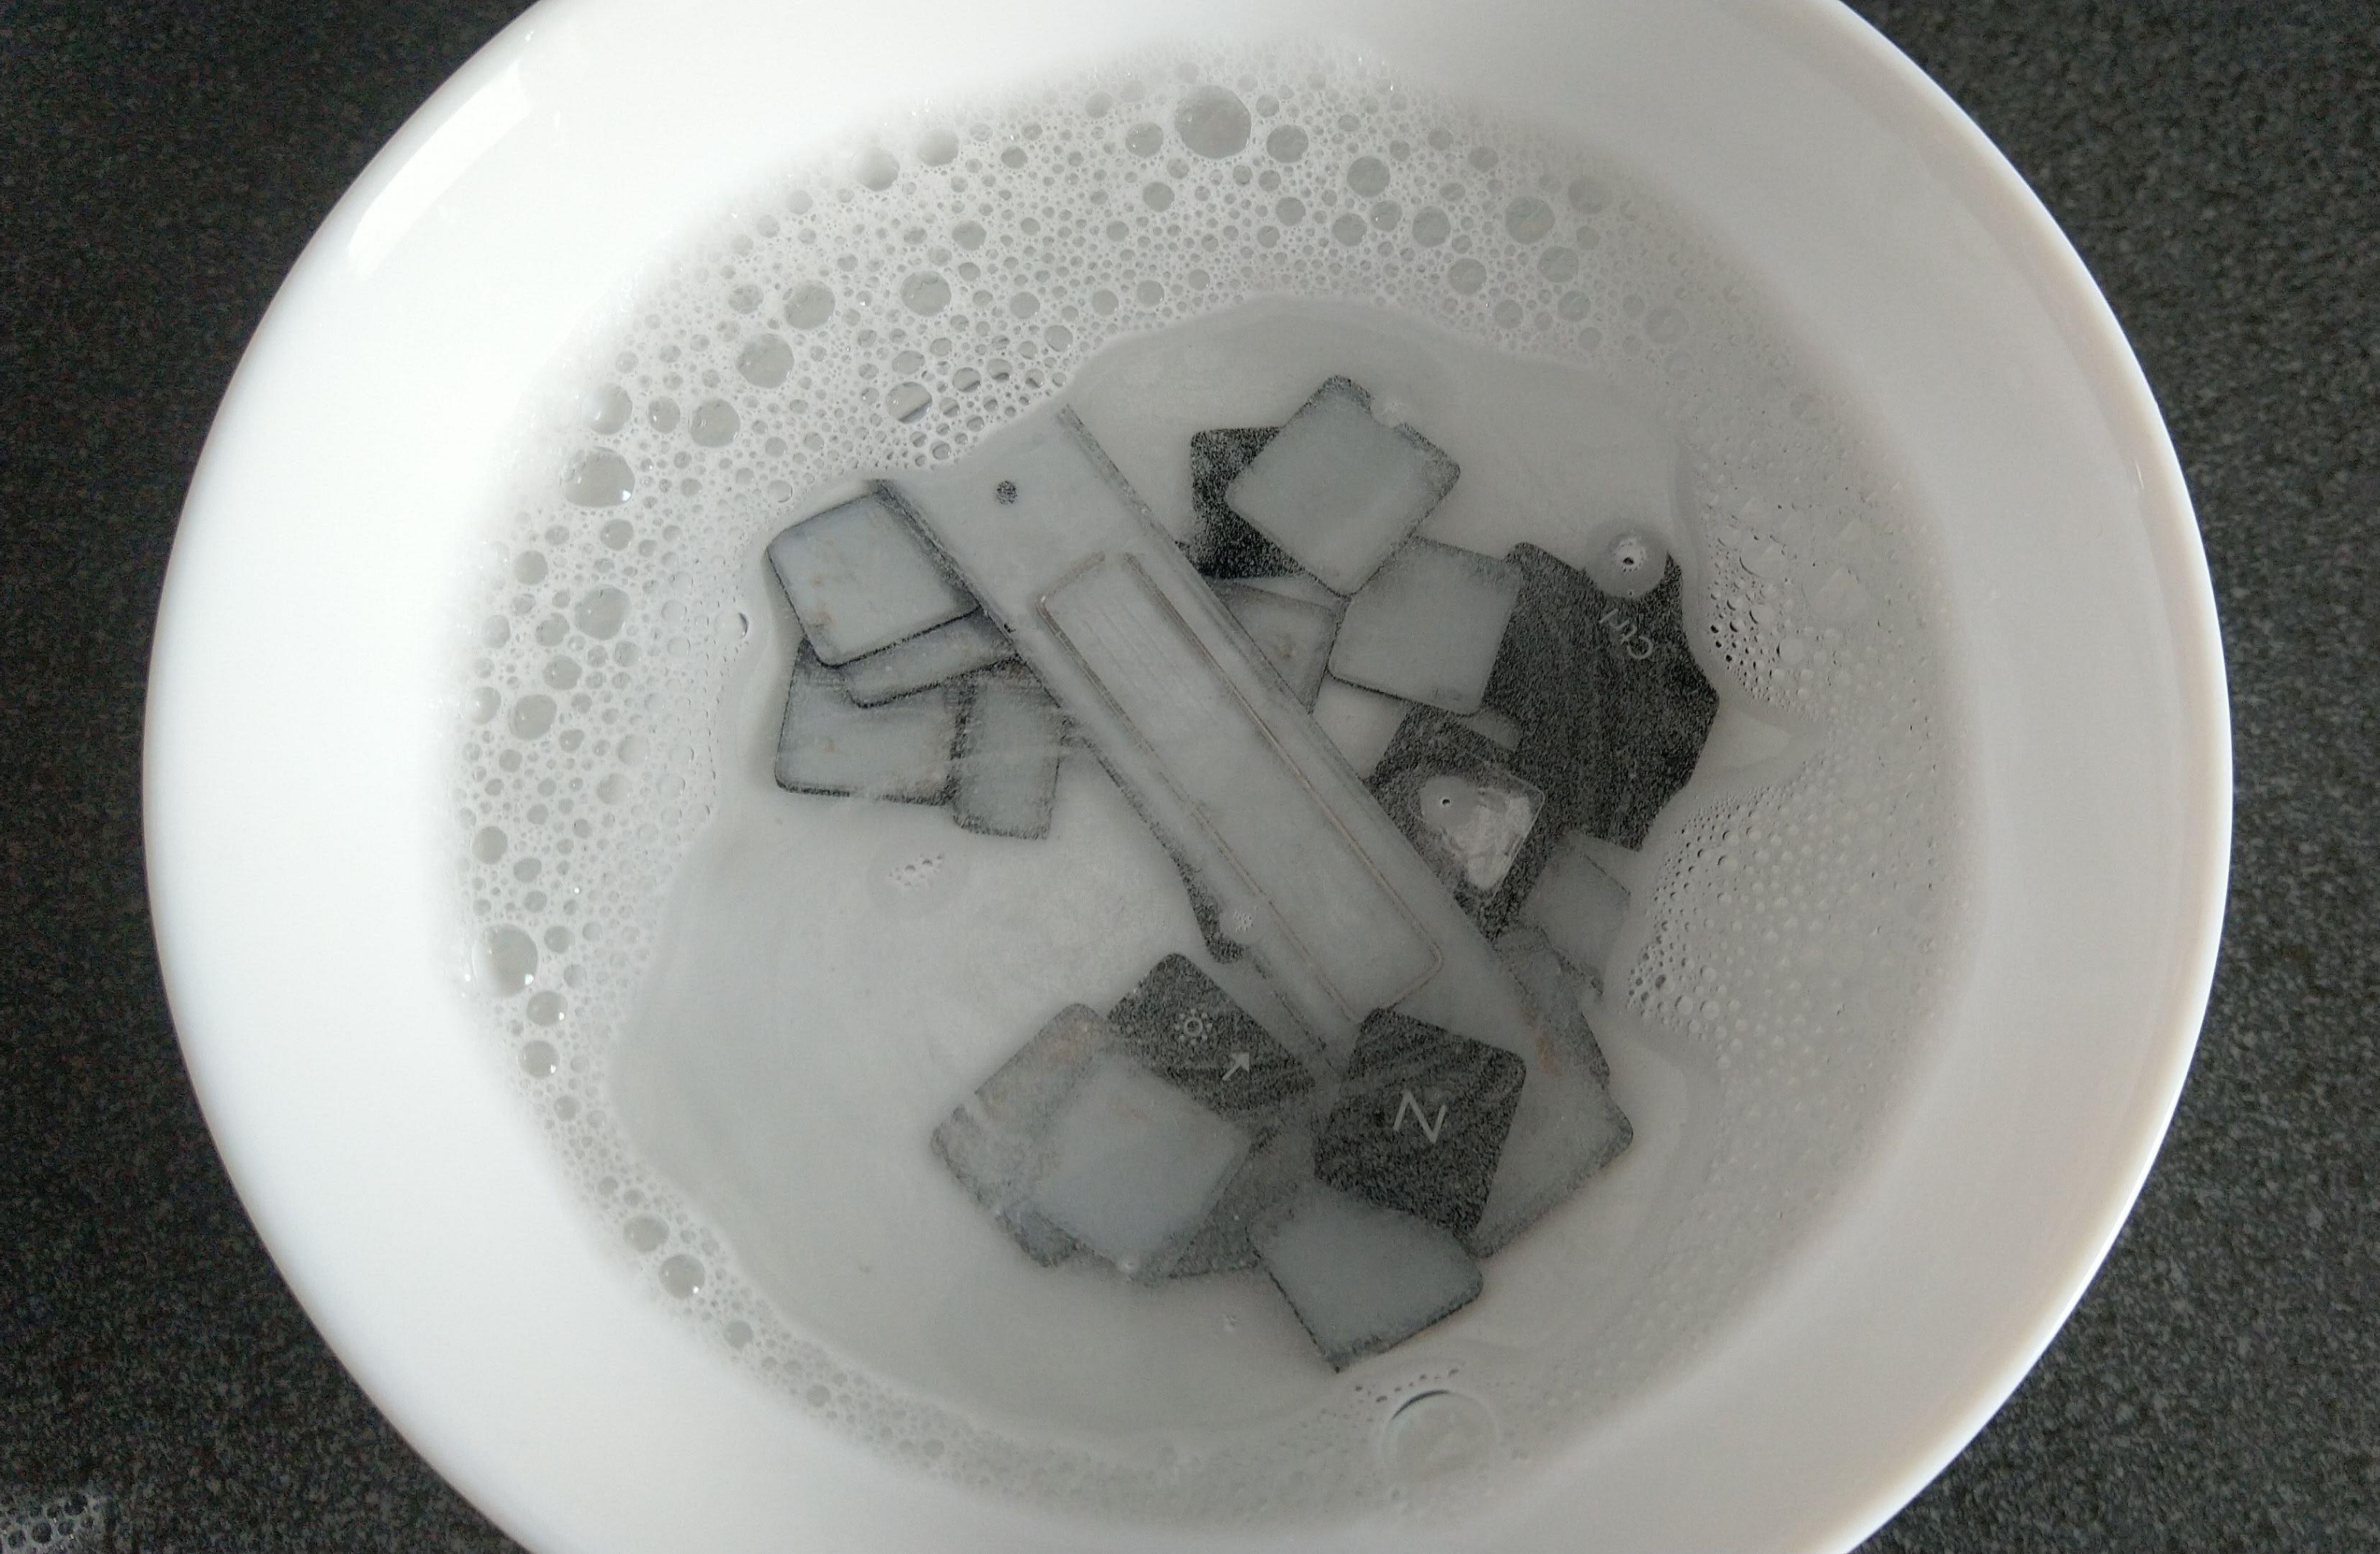
- Rinse and repeat until all the plastic parts look clean. If the parts are extra dirty, use fingertips to rub off the dirt. Notice: Be careful not to rinse the plastic parts down the drain.
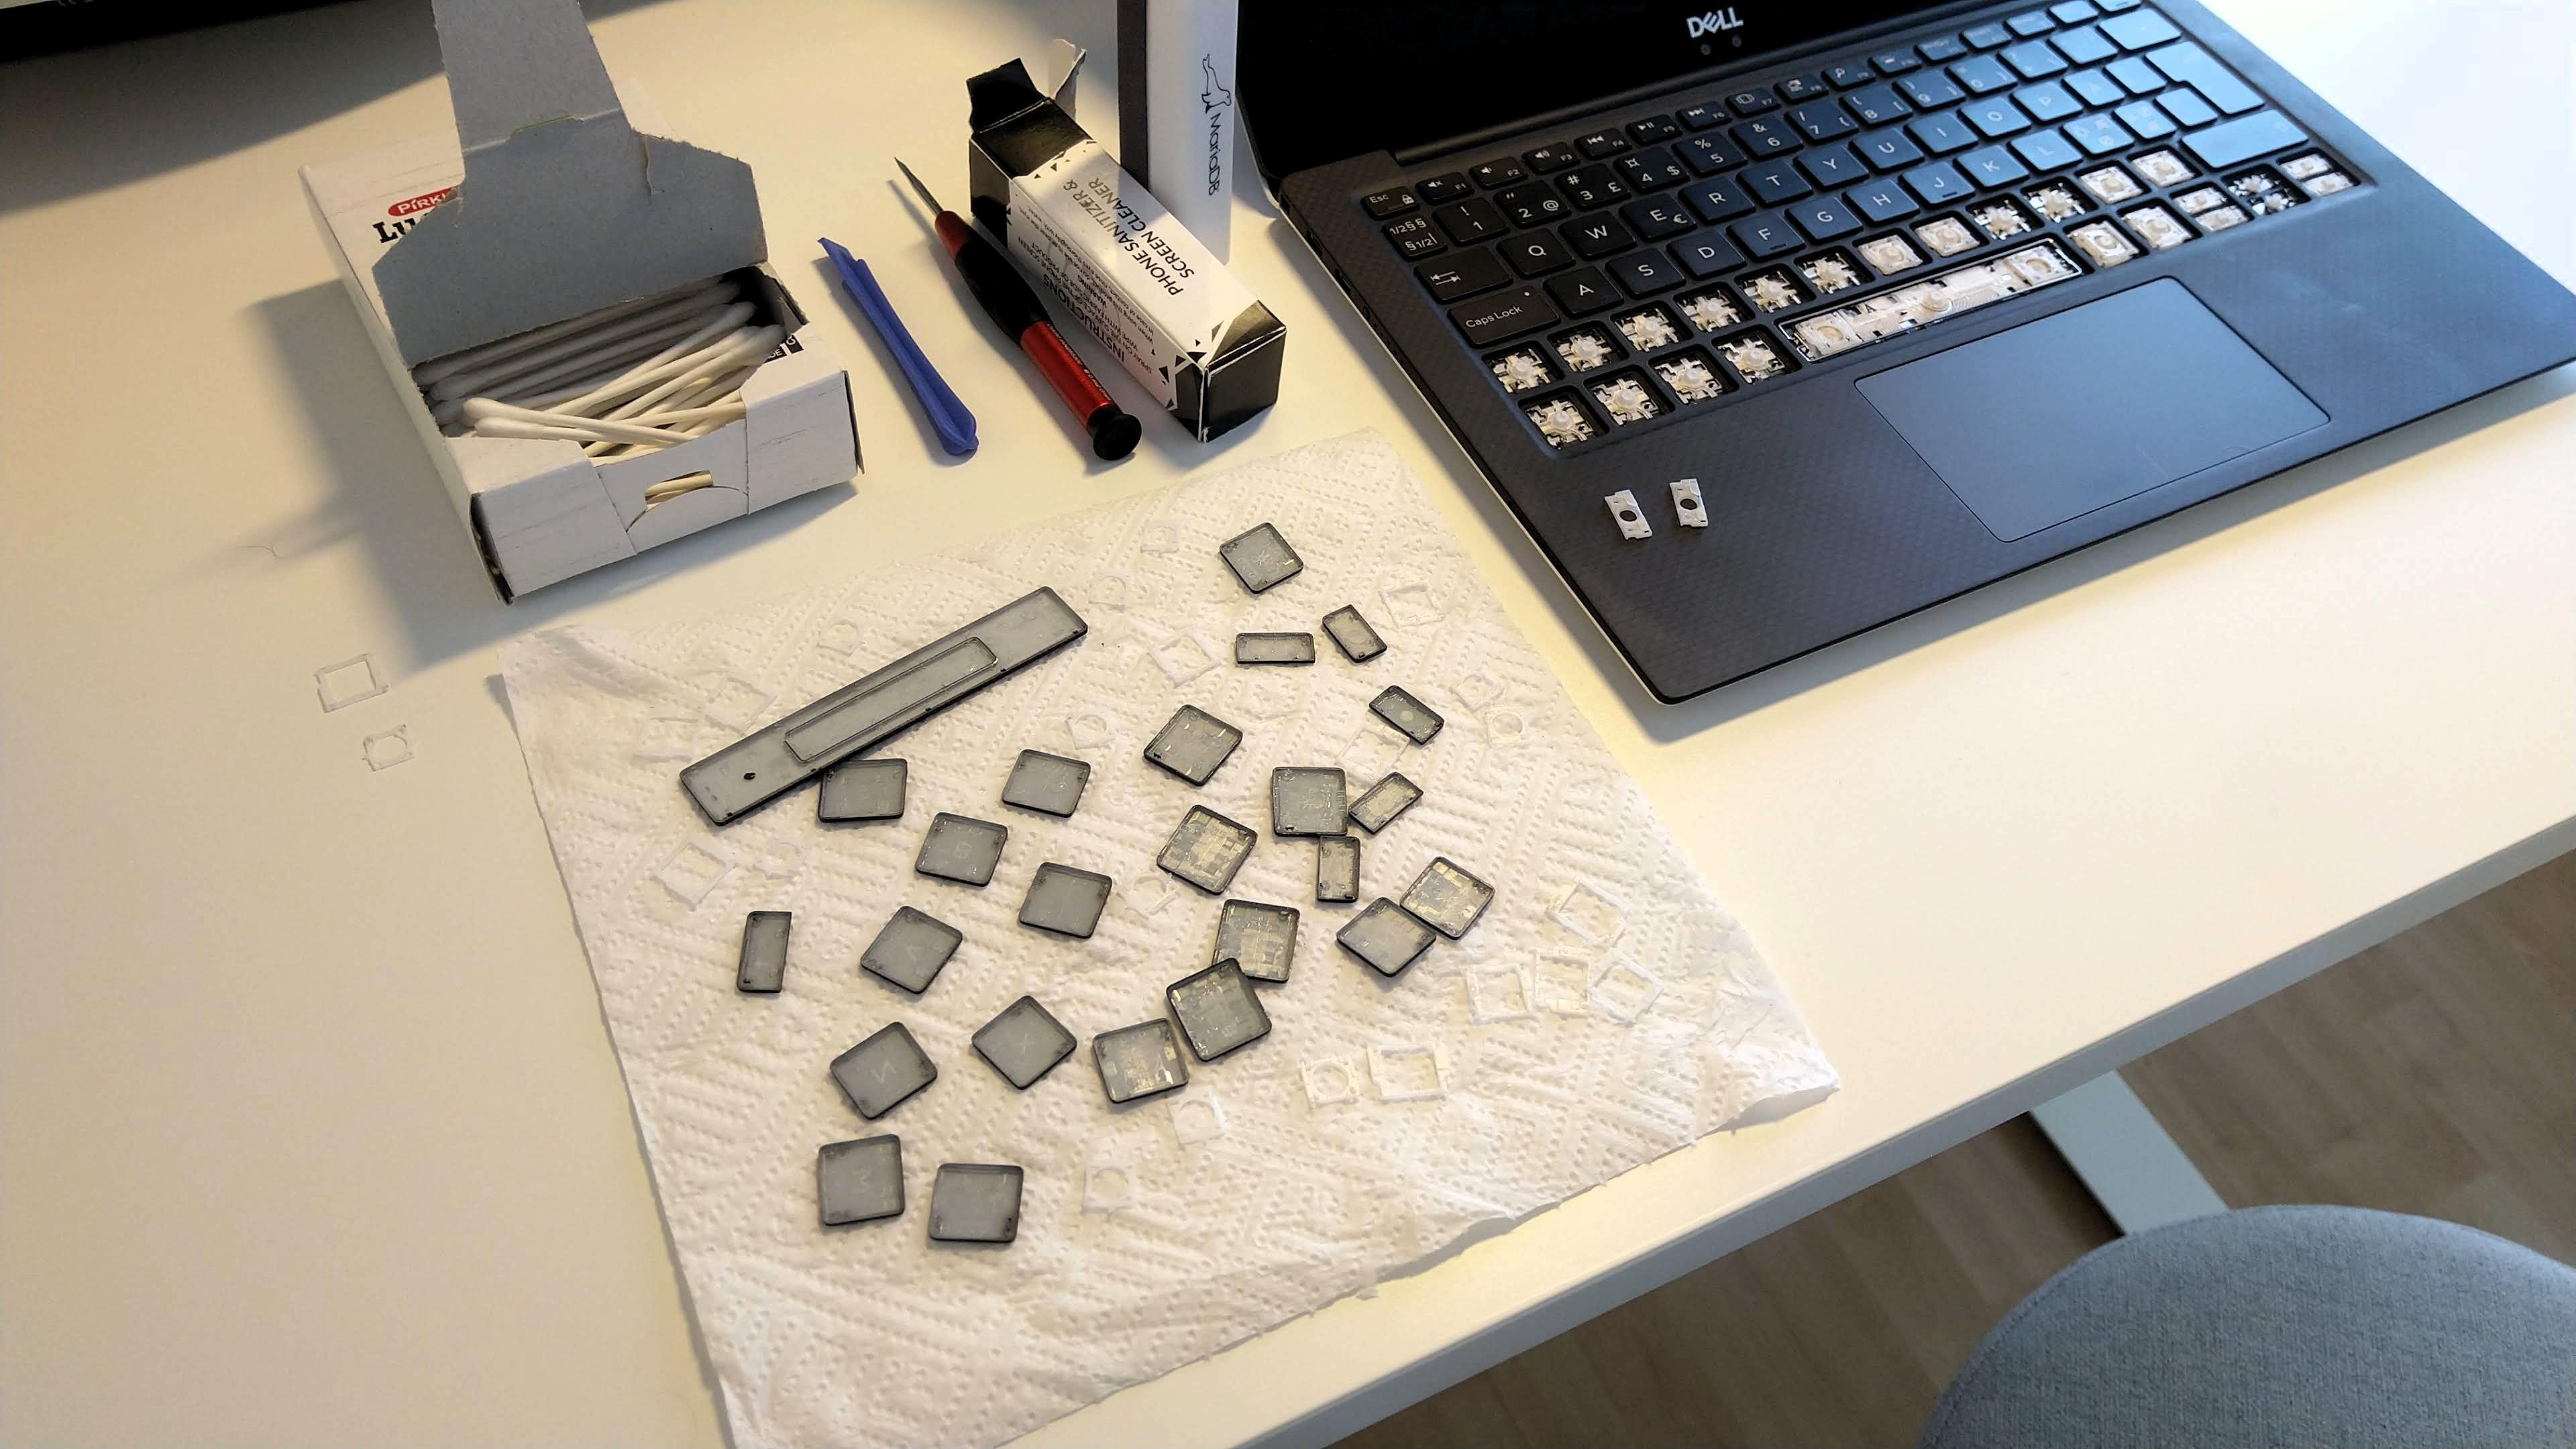
- Place the plastic parts on a paper towel and let them dry.
Cleaning the bare keyboard
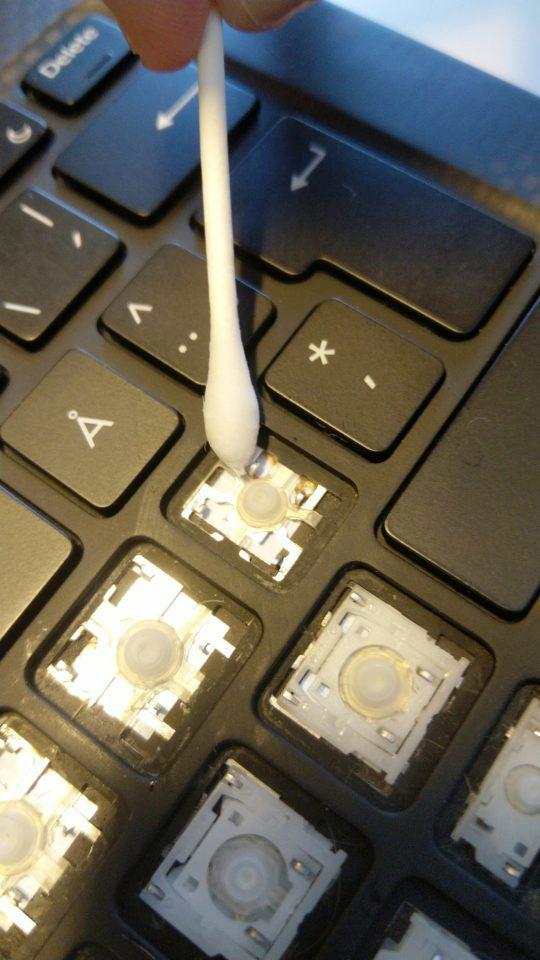
While the plastic parts are drying, clean rest of the keyboard. You will need two clean cloths (preferably microfiber) and cotton swabs. The cloth used for cleaning should be damp. You can use either water or isopropyl alcohol. Alcohol evaporates quickly and is less likely to leave any moisture around. Cotton swabs are great for hard to reach areas. Finish the cleaning with a dry cloth.
Reassembly
Once everything has dried up, you can start reassembling the keyboard. Now is a good time to look at that photo you took in the beginning. If for some reason you didn’t take a photo or you lost it, no worries – Youtube and Google are your friends.
When reassembling a key, do not use excessive force. It should easily snap in place and once so, test that it feels correct. If not, disassemble and reassemble until it does.
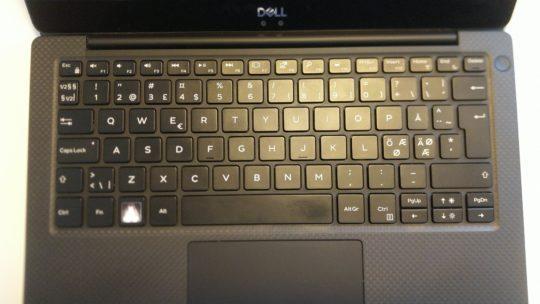
When done, the keyboard should look just like new. Issue fixed!
Maintenance in the future
Cleaning your keyboard every once in a while is a good practice to keep it working properly. Dust, grease and crumbs can easily get under the keycaps and potentially harm the device. A thorough clean-up takes about an hour, but it ensures that your keyboard will be in the best working condition. If you want to try and speed up the process, use compressed air to blow out any loose dirt.
On a laptop, keys always break when you remove them. Never do it yourself but pay a professional.
Nice post!
Great post!
But what to do when you spill something corrosive like coffee?
viljami, you do this: https://www.youtube.com/watch?v=_JNIGmTElaU