

Two-factor authentication (or simply 2FA) is a way of authentication where a user must provide additional verification after username and password login. The form of verification can be a string of characters delivered via text message or generated with TOTP client. Two-factor authentication improves security because compromised username and password are not enough to get the account breached.
This article will explain how to use TOTP clients for two-factor authentication and why TOTP is better than many other two-factor methods. As an example, I will show how to enable and set up TOTP client Google Authenticator in Google’s services.
What is TOTP?
TOTP is a Time-based One-Time Password algorithm, and it can be used in two-factor authentication instead of SMS or paper list verification codes. TOTP client generates periodically a new code that can be used to verify the login.
TOTP is based on cryptographic functions. When enabling TOTP, the service gives a shared secret that is entered to the client, either by scanning a QR code or writing it in text. Cryptographic functions use this shared secret and current time to generate codes to verify the login. The code generation also works without connection to the internet.
The TOTP client on a smartphone is safer than many other two-factor authentication methods, like codes sent via SMS or email. Getting hold of someone’s SMS is somewhat troublesome but still possible. An email account can also be compromised – especially if the password is also used in other places.
It’s a good idea to backup all the shared secrets that are used to generate TOTP codes. Either in text format or as a screenshot from the QR code. That way, you don’t get locked out from your accounts even if your phone gets lost. Backups of TOTP shared secrets should be stored with the same carefulness as passwords because anyone that receives the shared secrets can generate the same codes. All services don’t provide the shared secret in a text format, which should be considered when choosing a backup method.
Google Authenticator is a popular and user-friendly TOTP client, but it doesn’t have functionality for backups. User needs to take care of backing up the shared secrets someplace else when adding them in the client. The client has import and export functionality, but it’s suitable only for transferring the data from an old phone to a new one. The old phone generates a QR code for the transfer, but if taking a screenshot is disabled, that can’t be easily utilized as a backup. Google Authenticator is available for Android and iOS.
There are also other TOTP clients, for example, Authy, Duo Mobile, FreeOTP, and andOTP. Authy and Duo Mobile have a cloud backup feature. FreeOTP has no backup functionality, but andOTP allows exporting shared secrets in JSON format (plain-text or encrypted) and storing to your place of choice.
Preparing Google account for 2FA
Next, I will show you how to enable two-factor authentication in Google services. After that, we will install Google Authenticator and enable 2FA with Google account. In this guide, I will log in to a Google account with a desktop browser, which is very similar to how the process works for other services.
Login to your Google Account and proceed in the menu to Security> Signing into Google > 2-step verification.
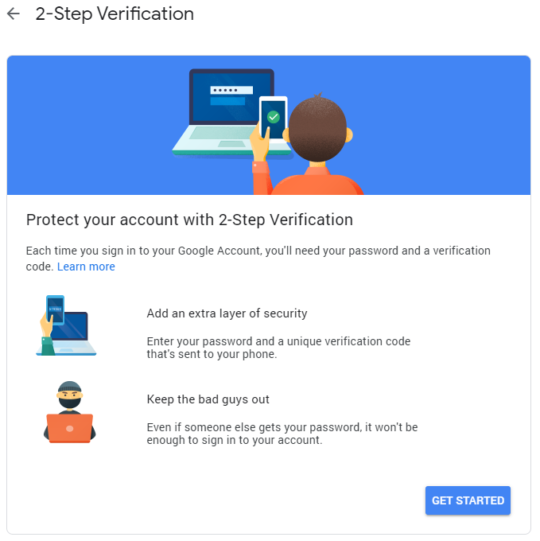
If two-step verification is enabled on your Google account, you should already see an option for Google Authenticator on this page, and you can continue to the next part of this article (Installing Google Authenticator). Otherwise, continue this part. Google has now opened a window where is introduced two-step verification. You can read it through and then click forward.
On the next page, you need to select the phone you would like to use. If you can’t see your preferred phone there you need to add the Google account in question to your preferred phone:
Android: Go Settings > Accounts > Add account. Choose Google and log in.
iOS: Install Google app and login with your Google account.
Google doesn’t let you choose Google Authenticator right away. First, you need to enable some other way of two-step verification: Google Prompts (default), security key, text message, or a phone call. Google Prompts is a window that will open on your phone and let you select yes or no. Keep the default, and move forward.

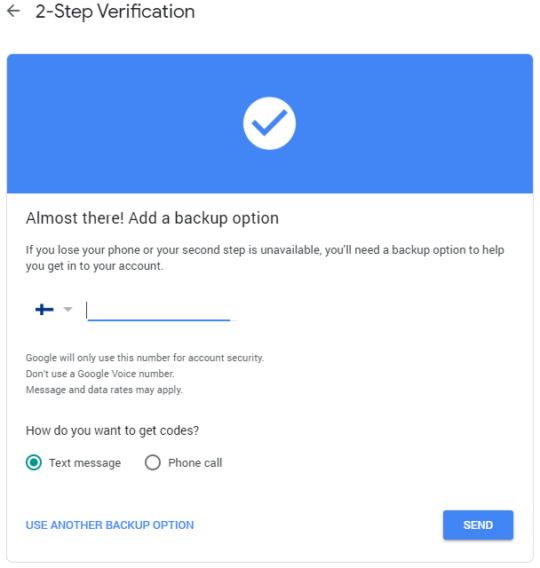
Select “yes” in the prompt when it on your phone. After that, you still need to set a backup option for getting verification codes. You can add a secondary phone number to get into your account even if your phone is lost. You can use your primary phone number here if you promise to back up the shared secret, which we will get to later.
Select the text message or a call and write the code you get to the window that opens after pressing “send.” Text messages can sometimes take a long time to arrive, and a phone call could be faster (in this alternative, a robot voice reads you the code).
After that one more time is asked if you want to enable 2-step verification. Select yes and continue.
Installing Google Authenticator
Installing Google Authenticator to a smartphone is straightforward. It can be installed just like any other app from the app store. The app is free and will also work offline after the installation.
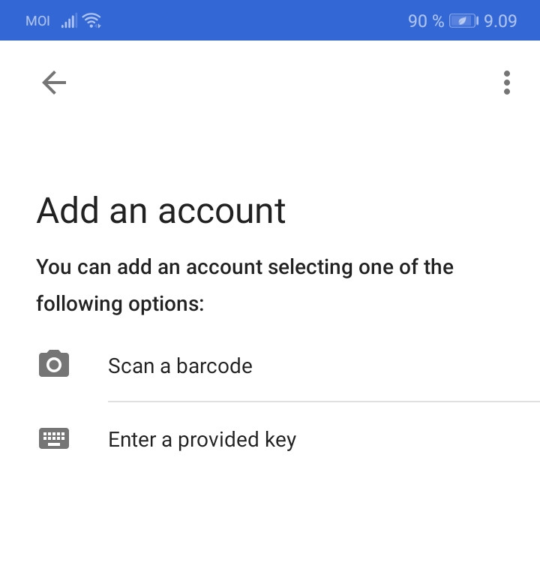
When opening the app the first time, it will show you a few introduction slides. Browse through them and press forward. Then you will see the following view where accounts (shared secrets) can be added to the app. Google Authenticator is now installed, and it’s ready to receive shared secrets. Leave your phone wait in this view.
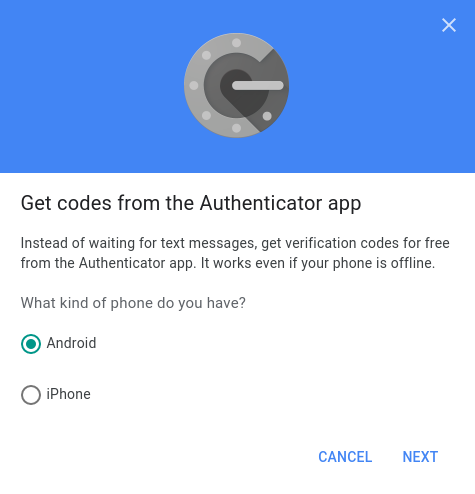
Your desktop browser should now be in Google account’s page 2-step verification (if not, go to Security > Signing into Google > 2-step verification). Roll down until you see the Authenticator app and press “set up.” In the opening window you can choose your phone’s OS:
After this, a window opens where you can scan the QR code. Choose the option “scan a barcode” on your phone and scan the code.
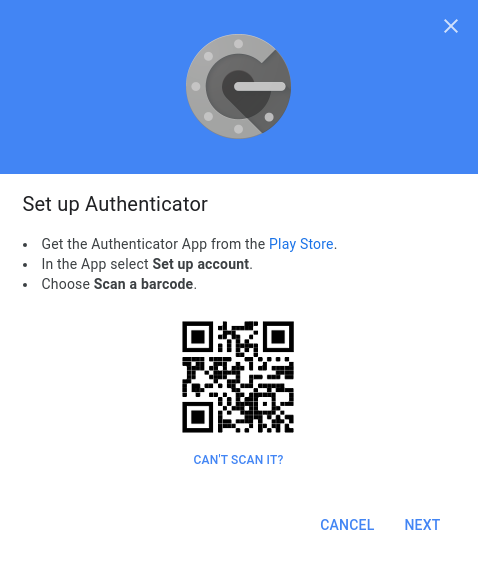
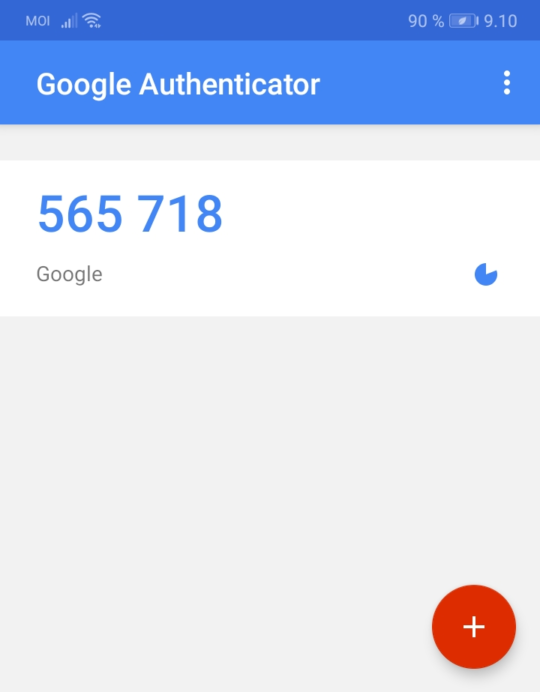
After scanning, you can press the link “Can’t scan it?” to get the shared secret in text format for backup purposes. After the scan, your Google Authenticator should look something like this:
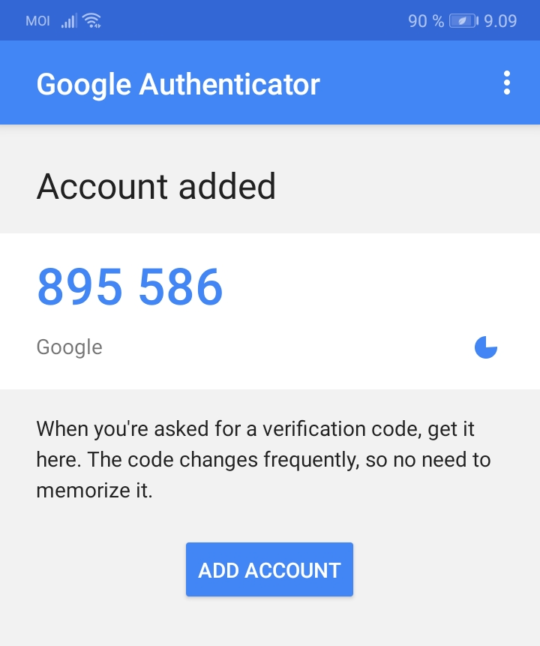
On the right side of the code, you can see a diminishing pie icon, which indicates how long the current code is valid. A new code is generated every 30 seconds by default.
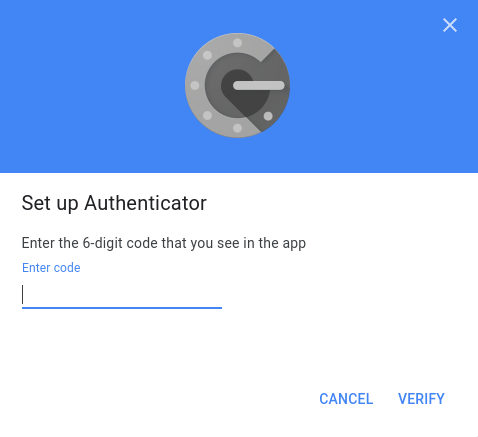
After this, proceed in the browser window and click next. The next page asks you to insert a verification code. Write the code you see in the app and hit verify before a new code is generated.
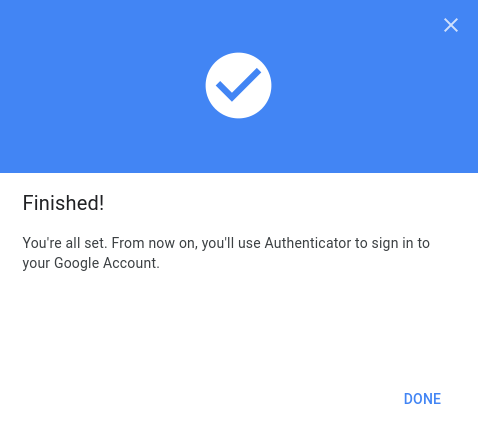
After this, Google Authenticator has been successfully enabled.
From now on, Google will ask a verification code when you log in to Google. Just opening the app on your phone is enough, and you can see the code. Other accounts can be added to the app from the plus sign button in the bottom right.
Please note that if you want to disable two-factor authentication, you must first disable it from Google’s settings (or whichever service is in question). Just removing the Google Authenticator or the shared secret does not disable two-factor authentication. You might only end up locking yourself out from your account.
You have now significantly improved the security of your Google account. Next, you should check which other services that you use offer two-factor authentication.
3 thoughts on “Improve your security with two-factor authentication”