

![]() Btrfs (pronounced Better FS) is a relatively new filesystem that operates on the copy-on-write principle (abbreviated COW, which stems a more friendly pronunciation for btrfs: Butter FS). Btrfs includes a lot of interesting functionality and replaces traditional Linux disk and filesystem tools like LVM (volume manager, disk snapshots) and mdadm (software RAID).
Btrfs (pronounced Better FS) is a relatively new filesystem that operates on the copy-on-write principle (abbreviated COW, which stems a more friendly pronunciation for btrfs: Butter FS). Btrfs includes a lot of interesting functionality and replaces traditional Linux disk and filesystem tools like LVM (volume manager, disk snapshots) and mdadm (software RAID).
In RAID usage btrfs is much more flexible and space efficient than traditional mdadm, because in btrfs the disks in the RAID array do not conform to any predefined size or count requirements. You can attach any amount of disk of any size to a btrfs RAID array, and btrfs will automatically balance the data across the devices according to the requirements of the selected RAID level. RAID levels 0 and 1 are currently supported while RAID 5 and 6 are under development and will be available as officially supported configurations soon.
Let’s take an example case to see how btrfs RAID works. In traditional mdadm based RAID if you have two 1 TB disks configured to mirror each other in RAID 1 mode, and you want to expand this setup, you basically need to install two more disks, and they need to be of equal size. In btrfs, life is much more flexible.
To expand an array, you can add a disk of any size and btrfs will automatically adjust to the sitation. So if you have two 1 TB disks, and you add a 2 TB disk to the array, then all 4 TB would be utilised and you will have 2 TB of usable storage. Btrfs will make sure that as RAID 1 mandates, each file will exist in two copies and those copies are stored on physically different disks. If you would expand the two 1 TB array with one 1 TB disk, then btrfs would give you 1,5 TB of usable disk space in total while still satisfying the RAID 1 replicate requirements.
Btrfs RAID is flexible also in the sense that you can either create the RAID array by running something like mkfs.btrfs -d raid1 -m raid1 /dev/sdb1 /dev/sdc1 when you create the partitions, or you can at any later time convert existing partitions to use RAID by running a command like btrfs balance start -dconvert=raid1 -mconvert=raid1 /home
If RAID is active, it will be visible in the btrfs filesystem df command:
$ btrfs fi df /home
Data, RAID1: total=1.59TiB, used=1.59TiB
System, RAID1: total=32.00MiB, used=256.00KiB
Metadata, RAID1: total=10.00GiB, used=8.27GiB
unknown, single: total=512.00MiB, used=0.00
Keep in mind, that the free values shown by the normal df are not reliable, as it is hard to predict how disk usage will behave in a copy-on-write and snapshotting filesystem like btrfs.
Recovering from failed disks in btrfs
If a disk in a btrfs RAID 1 array fails, then btrfs will refuse to mount that filesystem and error messages will be visible in the syslog. If it was the root filesystem, then the system will refuse to boot normally and the system will usually boot to an initramfs console. Luckily all decent systems that support btrfs (like Ubuntu 14.04) will have btrfs tools included in the initramfs environment, so you can run btrfs commands from there and try to recover from the situation without the need to boot the system form an alternative media, like a live CD.
A btrfs volume with a failed (missing) disk will output something like this:
$ btrfs fi show
Label: none  uuid: 4e90ec15-e6f5-470d-96be-677f654a5c79
    Total devices 3 FS bytes used 1.59TiB
    devid    1 size 2.71TiB used 1.60TiB path /dev/sda1
    devid    2 size 1.80TiB used 1.48TiB path
    devid    3 size 447.14GiB used 121.00GiB path /dev/sdc1/pre>
To force the btrfs volume to mount anyway, the degraded option can be used:
$ mount -t btrfs -o degraded /dev/sda2 /home
The correct thing to do when a disk in an RAID array fails, is to replace it. Once you have a new disk in place notify btrfs about it with the command:
$ btrfs replace start /dev/sdd1 /dev/sdb1 /home
This command reads files both from the original drive (if still accessible) and from other disks in the RAID array, and uses that information to populate the new clean disk.
If needed, the -r flag will prevent the system from trying to read from the outgoing drive if possible. Replacement operations can be canceled, but they cannot be paused. Once the operation is complete, /dev/sdc1 will no longer be a part of the array and can be disposed of.
In some cases one could also run btrfs device delete missing /dev/sdb1 and then add a new drive, but the replace command is the primary command and can be run even if the old drive is completely dead.
Recovering from filesystem corruption in btrfs
In cases where the physical disk has not failed but instead something in the btrfs journal or checksum trees is corrupted and does not match, and the filesystem refuses to mount, this is the recommended procedure to try:
First make a backup the volume.
After that try to mount the volume in the read-only recovery mode:
$ mount -t btrfs -o ro,recovery /dev/sda2 /home
If that fails, look in syslog (or run dmesg) and look for btrfs errors:
[ 74.926506] Btrfs loaded
[ 74.927393] BTRFS: device fsid 4e90ec15-e6f5-470d-96be-677f654a5c79 devid 2 transid 691061 /dev/sdc1
[ 77.439765] BTRFS info (device sdc1): disk space caching is enabled
[ 77.440620] BTRFS: failed to read the system array on sdc1
If there are messages relating to the log tree (not in the example above), then reset the log tree by running:
$ btrfs-zero-log
If syslog shows problems regarding the chunk tree, then btrfs rescue chunk-recover may be of used to replace the chunk blocks with new ones that should work (but may loose some data). Each disk has multiple copies of super blocks, and they are very unlikely to all get corrupted at the same time, but it happens they can be recovered with the rescue command:
$ btrfs rescue super-recover -v /dev/sde1
All Devices:
 Device: id = 3, name = /dev/sdc1
 Device: id = 1, name = /dev/sda2
 Device: id = 2, name = /dev/sde1

Before Recovering:
  [All good supers]:
      device name = /dev/sdc1
      superblock bytenr = 65536

      device name = /dev/sdc1
      superblock bytenr = 67108864

      device name = /dev/sdc1
      superblock bytenr = 274877906944

      device name = /dev/sda2
      superblock bytenr = 65536

      device name = /dev/sda2
      superblock bytenr = 67108864

      device name = /dev/sda2
      superblock bytenr = 274877906944

  [All bad supers]:
      device name = /dev/sde1
      superblock bytenr = 65536

      device name = /dev/sde1
      superblock bytenr = 67108864

      device name = /dev/sde1
      superblock bytenr = 274877906944
After those, try btrfsck, and possibly with options -s1, -s2, -s3. It the volume is still not mountable, then try btrfsck --repair.
The command btrfsck --repair --init-extent-tree may be necessary if the extent tree was corrupted. If there is corruption in the checksums, try –init-csum-tree.
Last resort is to run btrfs check --repair but it’s not recommended because it might write changes to the disk that destroys data.
Generic tools might also be useful. For example the tool testdisk is able to scan disks and find lost partition tables, including ones with btrfs partitions.
Restoring files from a broken btrfs filesystem
If it simply is impossible to mount a btrfs filesystem, it is possible to use the command btrfs restore to fetch files from withing a damaged btrfs partition. The default command will get all files from the root volume.
Sometimes simply restore isn’t enough. For example in Ubuntu, by default the /home directory is a separate btrfs subvolume. To fetch files from there the correct volume root must be defined via the -r option. Also you might not be interested in restoring all possible files, maybe just one particular directory, and for such use a filename filter can be defined with the --path-regex option.
To fetch all files from /home/otto/Kuvat on a system there the @home subvolume object id is 258, the task can be accomplished with the command:
$ btrfs restore -i -vvvv -r 258 --path-regex "^/(otto(|/Kuvat(|/.*)))$" /dev/sdc1 .
...
Restoring ./otto/Kuvat/2015/08/09/IMG_2888.JPG
Restoring ./otto/Kuvat/2015/08/09/IMG_2889.JPG
Restoring ./otto/Kuvat/2015/08/09/IMG_2890.JPG
Restoring ./otto/Kuvat/2015/08/09/IMG_2891.JPG
Restoring ./otto/Kuvat/2015/08/09/IMG_2892.JPG
Restoring ./otto/Kuvat/2015/08/09/IMG_2893.JPG
Found objectid=18094703, key=18094702
Done searching /otto/Kuvat/2015/08/09
Found objectid=18094632, key=18094631
Done searching /otto/Kuvat/2015/08
Found objectid=8304076, key=8304075
Done searching /otto/Kuvat/2015
Found objectid=272, key=271
Done searching /otto/Kuvat
Found objectid=258, key=257
Done searching /otto
Found objectid=257, key=256
Done searching
Detecting data corruption
If btrfs detects errors, they will be logged to syslog. Btrfs also maintains error counters, which on normal healthy drives should always list all zeros:
$ btrfs device stats /mnt
[/dev/sda2].write_io_errs   0
[/dev/sda2].read_io_errs    0
[/dev/sda2].flush_io_errs   0
[/dev/sda2].corruption_errs 0
[/dev/sda2].generation_errs 0
[/dev/sdc1].write_io_errs   0
[/dev/sdc1].read_io_errs    0
[/dev/sdc1].flush_io_errs   0
[/dev/sdc1].corruption_errs 0
[/dev/sdc1].generation_errs 0
Btrfs automatically calculates CRC-32C checksums for both data and metadata blocks, and at regular intervals checks if the checksums still match or not. If data corruption is detected, then btrfs will log errors to syslog. If RAID 1 is enabled, btrfs will also automatically fix the corrupted data by overwriting with by the correct duplicate. This process can also be automatically triggered by running btrfs scrub.
Checking disk health
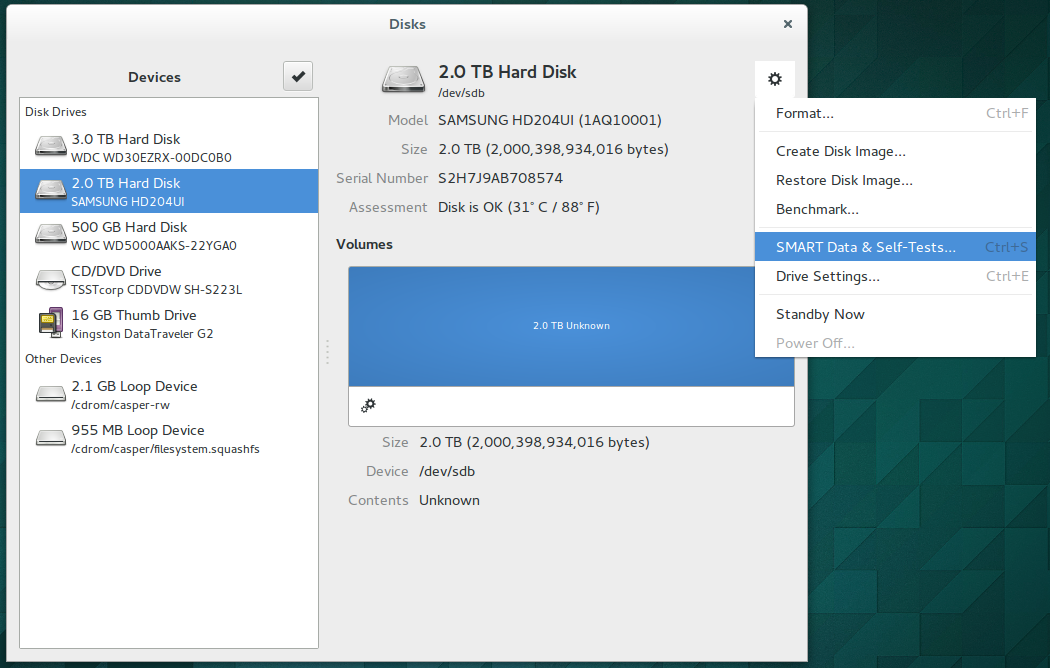
Disks that support the SMART standard are able to report their health status. The Gnome tool ‘disks’ provides a very easy way to access SMART data. Just open Disks, select a device and choose ‘Show SMART Data & Self-Tests’.
-

- Gnome Disks tool
-

- Gnome Disks tool SMART data
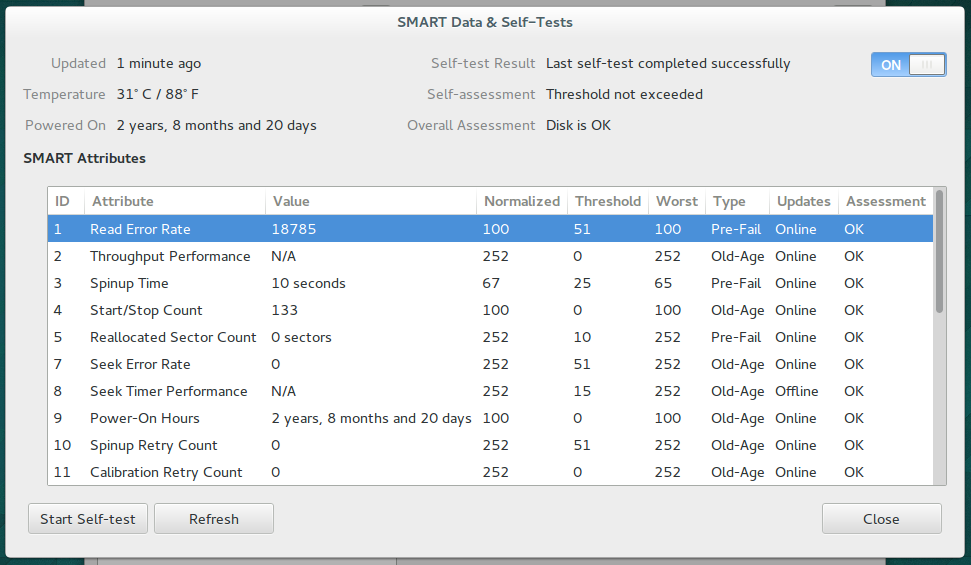
Alternatively a command line representation of the same data can be fetched with:
$ sudo smartctl -A -H /dev/sda
smartctl 5.41 2011-06-09 r3365 [x86_64-linux-3.2.0-90-generic] (local build)
Copyright (C) 2002-11 by Bruce Allen, http://smartmontools.sourceforge.net

=== START OF READ SMART DATA SECTION ===
SMART overall-health self-assessment test result: PASSED

SMART Attributes Data Structure revision number: 1
Vendor Specific SMART Attributes with Thresholds:
ID# ATTRIBUTE_NAME          FLAG     VALUE WORST THRESH TYPE      UPDATED  WHEN_FAILED RAW_VALUE
  5 Reallocated_Sector_Ct   0x0033   100   100   010    Pre-fail  Always       -       0
  9 Power_On_Hours          0x0032   098   098   000    Old_age   Always       -       6322
 12 Power_Cycle_Count       0x0032   097   097   000    Old_age   Always       -       2646
175 Program_Fail_Count_Chip 0x0032   100   100   010    Old_age   Always       -       0
176 Erase_Fail_Count_Chip   0x0032   100   100   010    Old_age   Always       -       0
177 Wear_Leveling_Count     0x0013   086   086   010    Pre-fail  Always       -       503
178 Used_Rsvd_Blk_Cnt_Chip  0x0013   094   094   010    Pre-fail  Always       -       184
179 Used_Rsvd_Blk_Cnt_Tot   0x0013   094   094   010    Pre-fail  Always       -       336
180 Unused_Rsvd_Blk_Cnt_Tot 0x0013   094   094   010    Pre-fail  Always       -       6192
181 Program_Fail_Cnt_Total  0x0032   100   100   010    Old_age   Always       -       0
182 Erase_Fail_Count_Total  0x0032   100   100   010    Old_age   Always       -       0
183 Runtime_Bad_Block       0x0013   100   100   010    Pre-fail  Always       -       0
187 Reported_Uncorrect      0x0032   100   100   000    Old_age   Always       -       0
195 Hardware_ECC_Recovered  0x001a   200   200   000    Old_age   Always       -       0
198 Offline_Uncorrectable   0x0030   100   100   000    Old_age   Offline      -       0
199 UDMA_CRC_Error_Count    0x003e   253   253   000    Old_age   Always       -       0
232 Available_Reservd_Space 0x0013   094   094   000    Pre-fail  Always       -       3080
241 Total_LBAs_Written      0x0032   099   099   000    Old_age   Always       -       15812437286
242 Total_LBAs_Read         0x0032   099   099   000    Old_age   Always       -       11879385910
Storing data efficiently and dependably are fundamental tasks in computing. Data integrity and data availability are key principles in information security. Btrfs is a promising technology that will help system administrators fulfill these goals and in particular with SSD disks btrfs should be the default filesystem choice for all new systems, and a must for syadmins to read up on.
Amendment 29.5.2016: Freeing up space on a Btrfs RAID system
If you even end up in a situation that your production disk is full, and you urgently must resolve it by creating more space, you can convert a live Btrfs RAID device to a normal single data device. This naturally risks that your whole system could fail miserably if a disk failure would occur during the time you don’t have RAID, but it might be worth taking a chance if a imminent full disk situation can be avoided and thus operations continue until you have time to work out a long-term solution. Basically if your Btrfs device had RAID-1 and you convert it you normal single mode, your disk space will double:
sudo btrfs balance start -dconvert=single -mconvert=raid1 /dataThis is a pretty nice feature that is made possible by the unique design in Btrfs. For example ZFS does not have a balance command at all.
Next steps: how to make sure that the admin sees disk error messages when they start appearing? Automatic mail to root account? Notification at command line login (motd) or on the graphical desktop to all users?
interested, it’d be very useful guide for sys admin…
waiting for the next article :)
We have 4 drives in RAID10 configuration. Let’s say that one will start to degrade and we want to replace it before it fails.
How do we know *which one* of the drives is going bad? They are physically identical. How do we know which is sdb2?
Before working with btrfs in raid mode it is advisable to write down details of disks using smartmontools with command smartctl -a /dev/sdx It is not mandatory but it is also advisable to label disks serial numbers at cite. Using this method you will easily find out what is missing in the array if disk(s) fails.
Other way is using dmesg to see what disks has been recognised by the system but for sure it will be more difficult than first method.
The name sdb2 means it is partition 2 of hard disk 2. Look on the mother board, there are often some numbers indicating order of disks. Slot 1 is sda, slot 2 is sdb etc. If the mother board does not have any markings, look at the BIOS messages during startup.
If there is no hard disk order list in the BIOS, as a last resort you might want to remove the cable of one hard drive at a time and check what the Linux startup complains about. It will tell you when sda or sdb is no longer visible.
@Otto: It is very dangerous to go by the slot numbers on the mother board to decide which disk to replace!
The order of disks as the kernel sees them does not necessarily have to be the same as the mother board slots. Especially, when a disk has failed completely so that the kernel does not detect it any more, the device names are reordered.
The safest way is to go by the serial number reported by smartctl as Ferry Tooth found out.
Hello…
Very interesting to a btrfs newbie…
Can you point me to any guides/information on how to do an Ubuntu(Desktop) 14.04 install straight on to 4 drives for btrfs in RAID 10…
Thanks
@Otto, I just discovered SMART shows the serial number which is also printed on the outside of the driver. Probltem solved.
@Dave, I would recommend Ubuntu 16.04 as the newer the kernel the better the btrfs. Other than that, just install to a single disk, then add 3 more disks to the pool later. Then convert the disk as in https://btrfs.wiki.kernel.org/index.php/Using_Btrfs_with_Multiple_Devices (data raid10 metadata raid1)
I do not understand the benefits of btrfs RAID1 for 3 disk arrays. With mdadm you get a true RAID 1; all blocks are mirrored 3 times, once on each disk. With btrfs the data is mirrored on any 2 disks of the 3 disks. While I can see a potential small performance benefit it seems to me you would lose redundancy since losing 2 disks would fail the array whereas in normal mdadm RAID 1 array you could fail 2 disks and still access the data.
Second can you use mdadm on top of btfrs for a stable RAID 5/6 which would keep lthe benefits of having btrfs (bitrot protection etc)?
I see one benefit, space. You will not lose space but you will gain a little bit more by adding an extra drive. Example, an array with 2x 4TB drives on Raid 1 will give you 4TB of space,
if you add a third disc of 4TB you will get an Array of 6TB.
If you lose one drive you do not lose data because all the content stored on drive 1 will be half on drive 2 and the other half in drive 3. I am using this setting and I just had one of the drivers dying on me, as I am typing this answer I am also removing the failed driver from the array. I believe I will be able to share my experience first hand very soon.
I am working on a use case where one of the device in my two device Raid1 btrfs is USB drive. The idea is to use this USB as a backup of this computer should the computer fail for some reason. This basic use case works except for one caveat. Say I create a new file with a lot of text on the Raid mount and disconnect USB right after saving such file. Then when I connect the USB to some other computer with btrfs installed, I can mount the USB in degraded mode and see the file. However, the file shows up empty. This is only true if there was not enough lag between the save of the file and disconnection of the USB. My questions are:
1) Is there a way to see the log of all mirroring activities performed by the btrfs raid?
2) I dont have any proof but simply a theory that there is some kind of trigger that triggers the btrfs mirroring of the file and its not instantaneous. How do I test this theory?
3) If point 2 were to be true, is there a way to force the raid to copy the contents immediately upon change?
4) If point 2 is totally off, what can explain the file being empty only certain times?
Thank you!
Hi, if mounting a degraded array fails without any error message it most likely worked, but systemd just unmounted it again.
See:
https://www.reddit.com/r/btrfs/comments/jbltne/how_to_replace_disk_when_mount_o_degraded_fails/
Or just uncomment the corresponding line in /etc/fstab and run systemctl daemon-reload and then try to mount again.